How do I add subpages to a Lessons page?
Instructors can add subpages to a top-level Lessons page. A top-level Lessons page is a Lessons page that is listed by name in the Tool Menu. Subpages are connected to top-level Lessons pages by a link or a button.
Note: Subpages are added to whatever page the Add Content / Add Subpage function is accessed from. To add multiple subpages to a top-level page, make sure you access the Add Content / Add Subpage function from the original top-level Lessons page and not from a subpage.
Go to Lessons.
Click on the Lessons Page Title (e.g. Unit #1) in the Tool Menu to display the page.
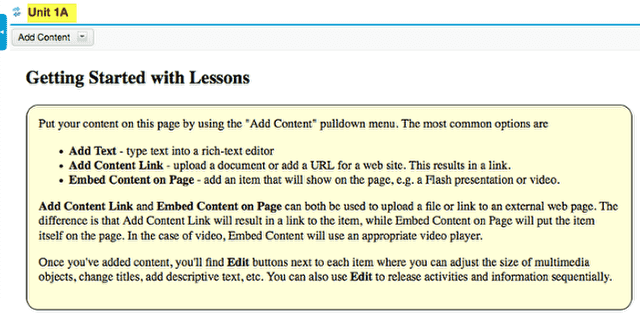
Note: The default or blank Lessons page contains text and images that explain the basic functionality of the Lessons tool.
Click Add Content, then Add Subpage.
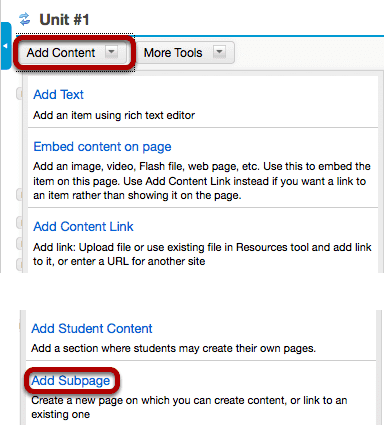
From the Add Content drop-down menu, select Add Subpage.
Enter the subpage information.
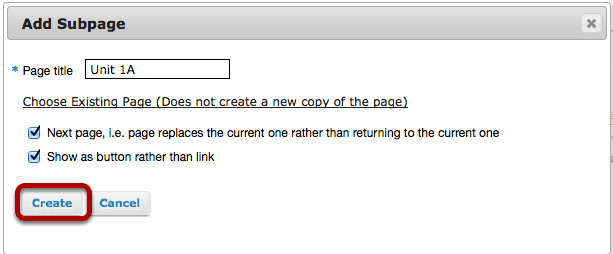
- Enter a title.
- Click the Choose Existing Page link to select from the index of existing pages in the site. (Optional)
- Select the Next page option if desired.
- Select the Show as button rather than link option if desired.
- Click Create.
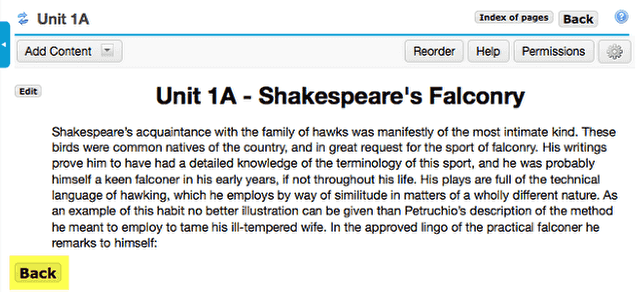
Example Subpage Unit 1A with added text.
Note: Clicking on the Back button takes the user back to the top-level page.
Example Unit 1 top-level Lessons page with button link to Unit 1A subpage
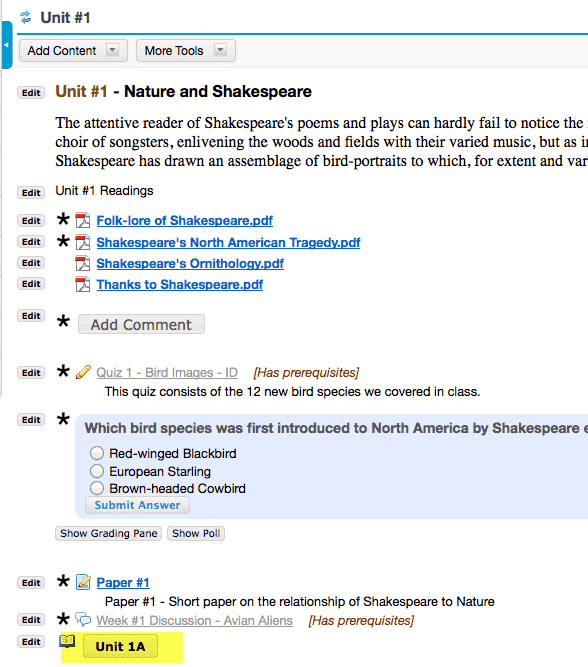
Note: Unit 1A button displays the subpage.
To edit the title and properties of a subpage: (Optional)
Click on the Settings icon.
The Settings icon is a gear-shaped icon located on the top right of the subpage.
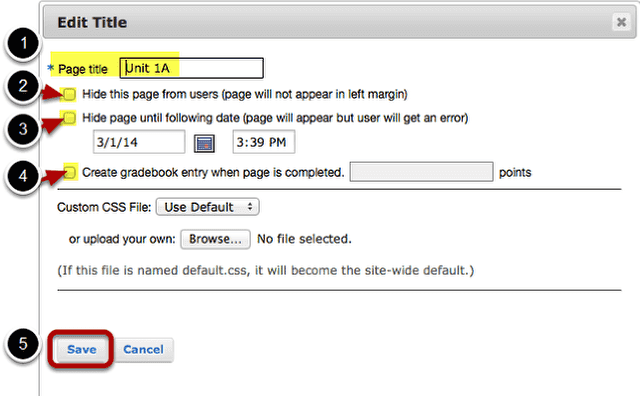
Edit the title and properties of the subpage as needed.
- The title of the subpage can be edited in the Page Title box.
- Check Hide this page from users to not allow students to access the subpage.
- Check Hide page until to allow access to the subpage at a particular date and tie.
- Check Create gradebook entry to automatically create an item in the gradebook when the page (and any required items on it) is completed.
- Click Save when finished.
