How do I add an alias?
Aliases may be added in several ways: using the Aliases tool, when creating or editing a site in Sites, or when adding the Email Archive tool. All existing aliases in the system will appear listed in the Aliases tool, regardless of how they were added.
Adding an alias from the Aliases tool.
Select the Aliases tool from the Tool Menu in the Administration Workspace.
Click New Alias.

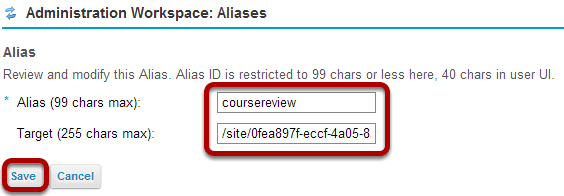
Enter the alias and its target.

Enter the alias you would like to create, as well as the target site for which it will be used. Then click Save.
For example, to create an alias named coursereview for a site with a site id of 0a8d9b18-c5b1-4a0a-aeaf-41235f68f101, you would enter:
- Alias = coursereview
- Target = /site/0a8d9b18-c5b1-4a0a-aeaf-41235f68f101
Creating an alias from the Sites tool.
Select the Sites tool from the Tool Menu in the Administration Workspace.
Select a site to edit.
Select either New site or click on the site id link for an existing site to edit.
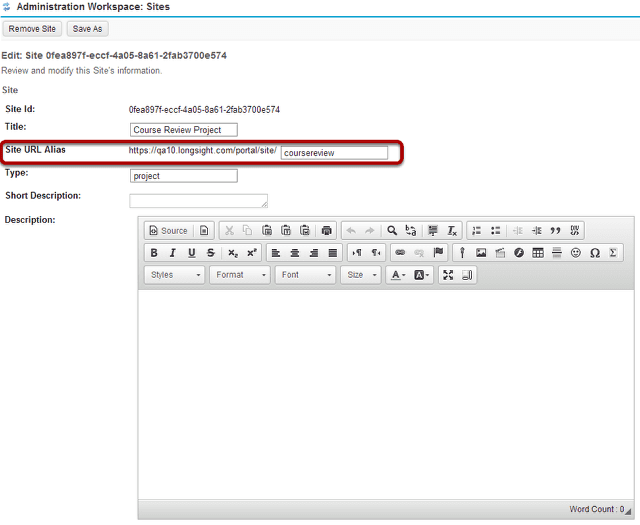
Enter the alias.
When creating or editing a site, you have the option to enter an alias in the Site URL Alias field provided.
Creating an email alias for the Email Archive tool within a site.
When the Email Archive tool is added to a site, the site manager is prompted to enter an alias that will serve as the email archive address.
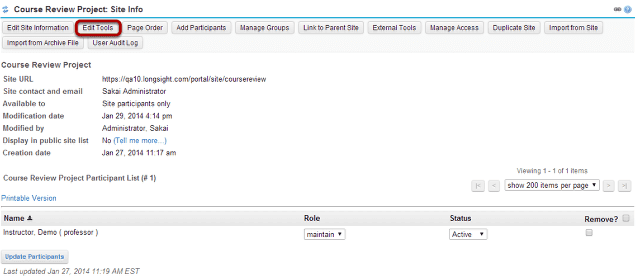
Go to Site Info.
Select the Site Info tool from the Tool Menu within your site.
Click Edit Tools.
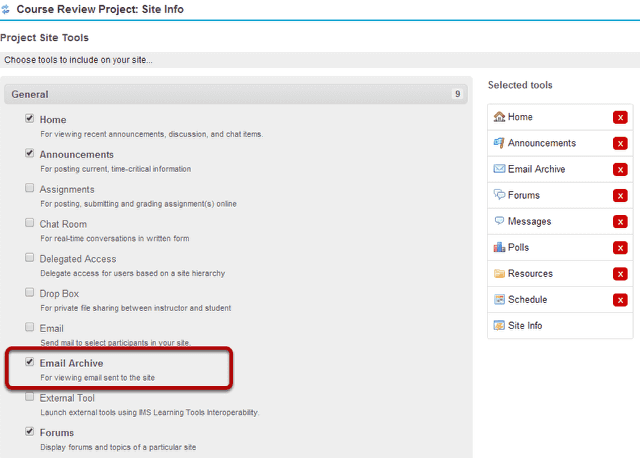
Select the Email Archive tool.
Scroll down and click Continue.


